Building a Production Ready Sign Language Character
What a 3D character actually needs to sign ASL: finger topology, deform hierarchy, facial openings, shape keys, and how to export a 400-bone Rigify rig to a web-sized GLB without breaking the hands.
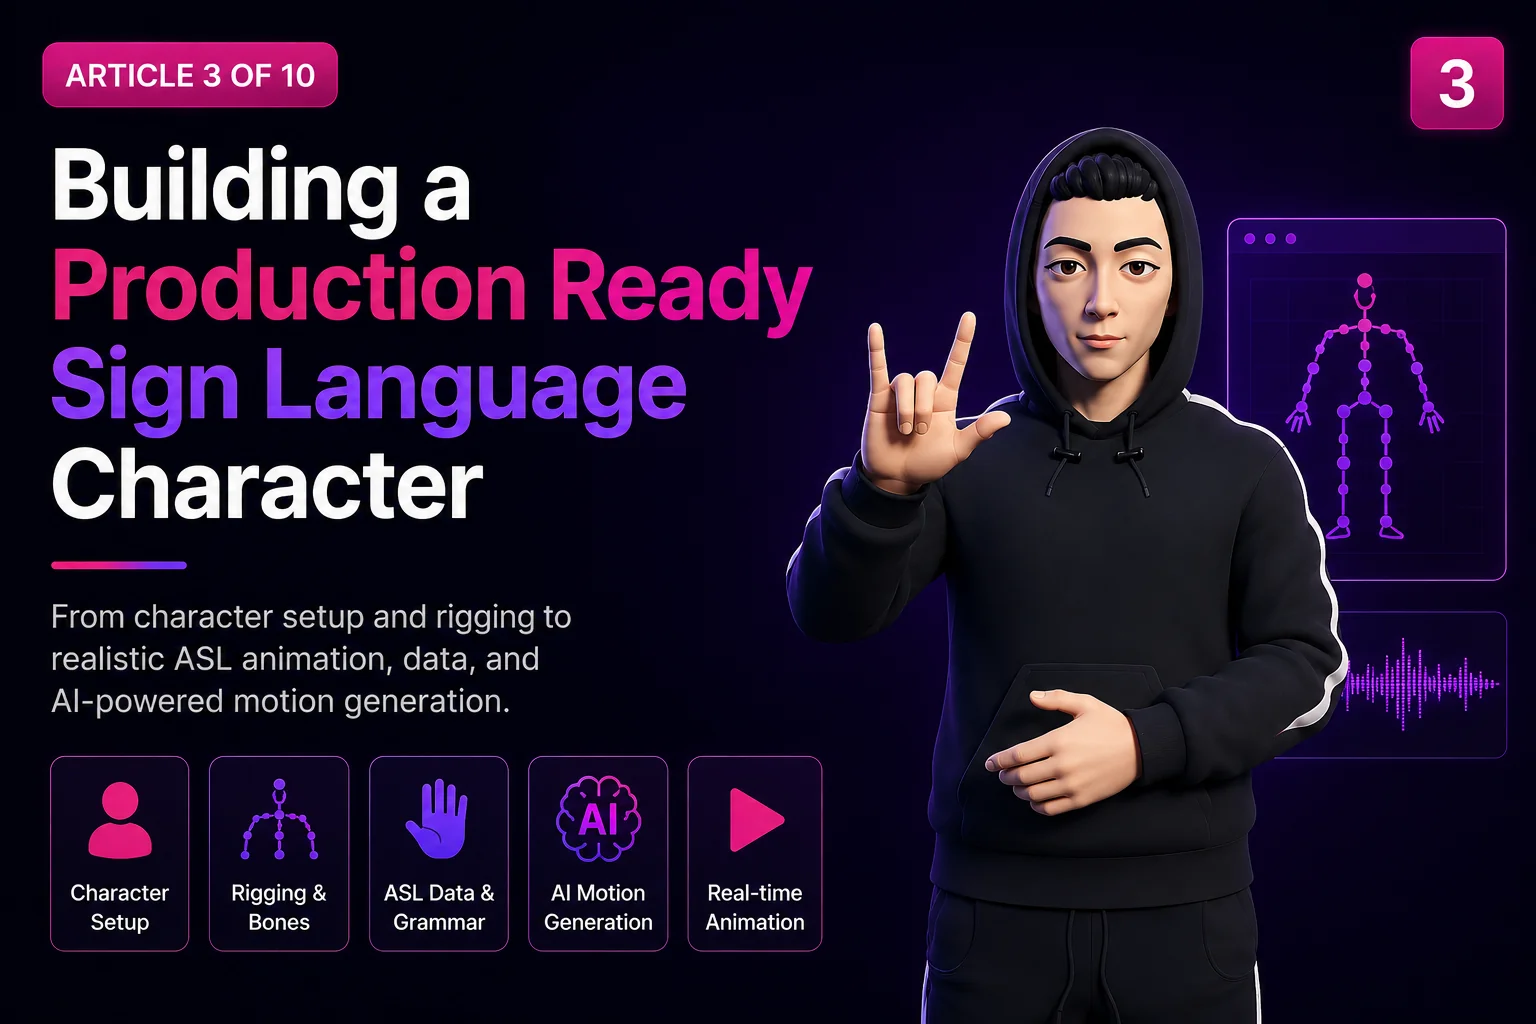
Most 3D characters cannot sign. Not because they look wrong, but because of specific structural things: fingers merged into a mitten, two bones per digit instead of three, no mouth opening, no eye sockets.
Sign language is a fine-motor task. The information is in the fingers and the face. A character that reads fine walking around a game level can be completely unusable for ASL.
This article covers what to check before you commit to a character, and how to get it out of Blender into a browser without breaking it. Every number here was measured from the actual project file.
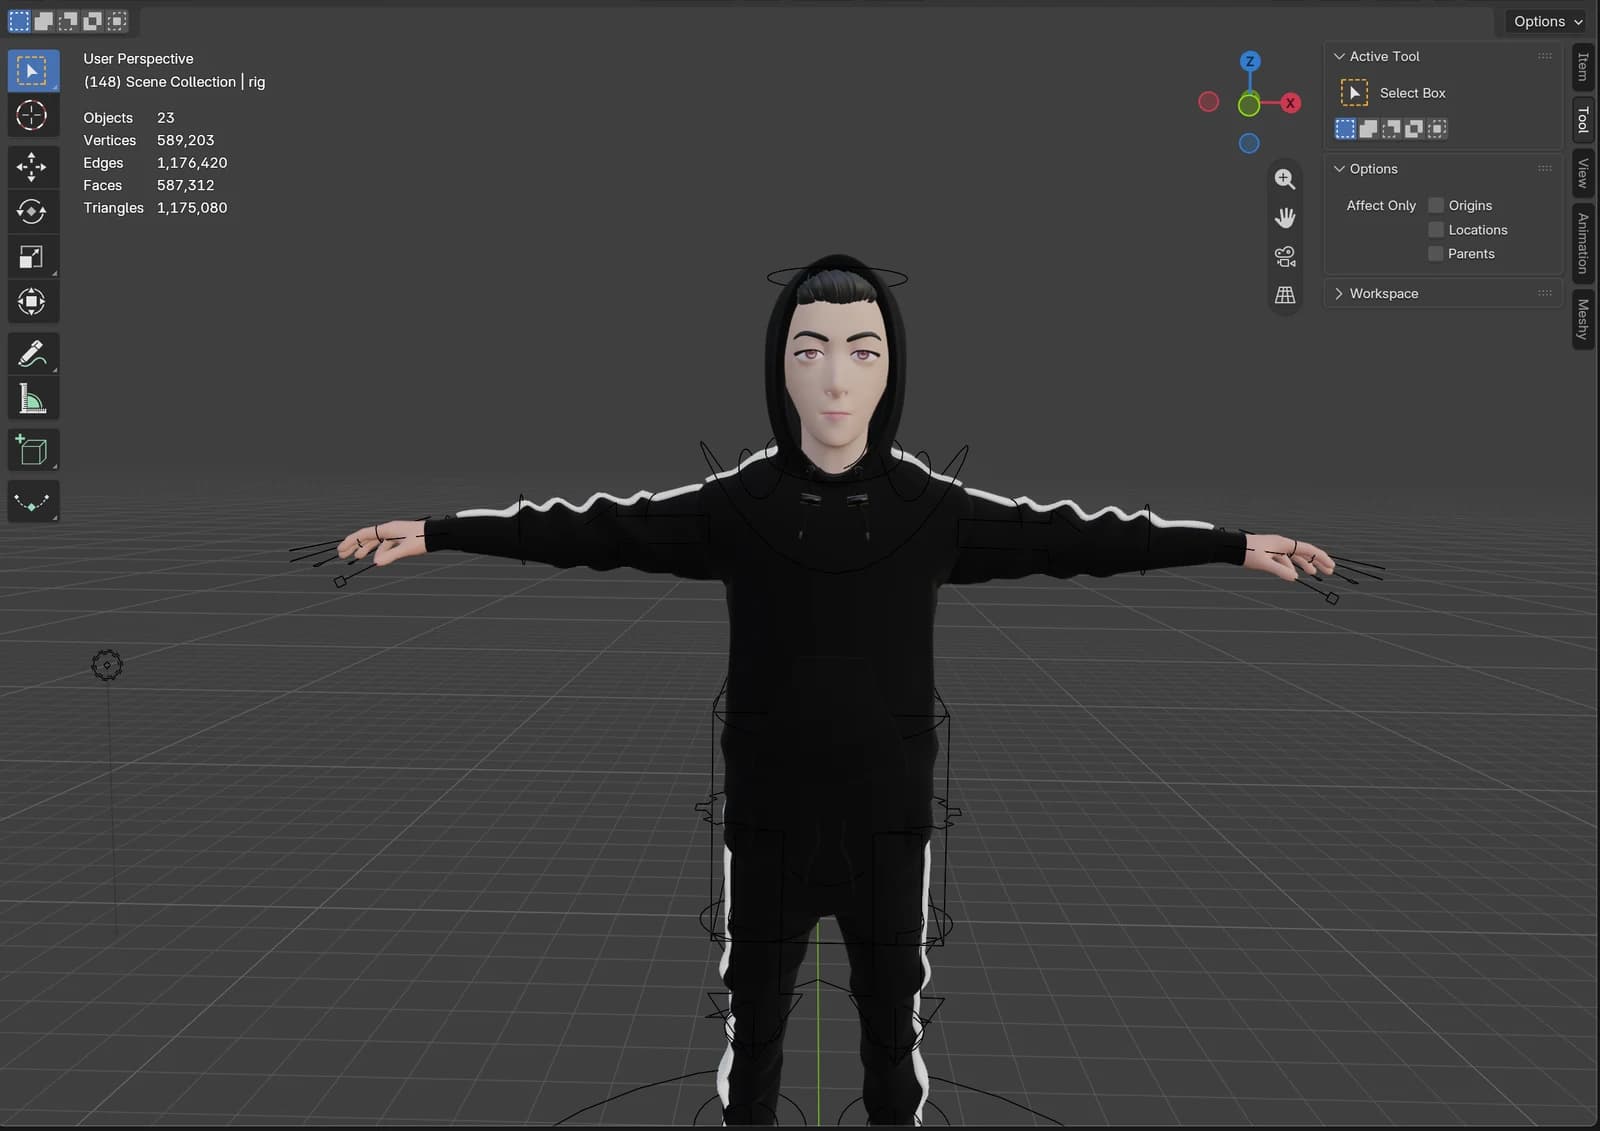
Choosing a character: the checklist that matters
Work backwards from what the animation system needs to do. For ASL that is four things, and each maps to a structural requirement.
Form handshapes (5, S, 1, H, bent-V and the rest): Requires three bones per finger, separated geometry.
Reach locations on the body and face: Requires a skeleton whose deform bones form one clean tree.
Show non-manual markers: Requires a face with real eye and mouth openings.
Deform without artifacts: Requires complete skin weights, no unweighted vertices.
Check all four before you start. Discovering the third one late means either sculpting a face or starting over.
Here is the verification query. Run it against any candidate:
import bpy
arm = bpy.data.objects["rig"]
bones = arm.data.bones

digits = {}
for side in ("L", "R"):
    for d in ("thumb", "f_index", "f_middle", "f_ring", "f_pinky"):
        chain = sorted(b.name for b in bones
                       if b.name.startswith("DEF-%s." % d) and b.name.endswith(".%s" % side))
        if chain:
            digits["%s.%s" % (d, side)] = {
                "bones": chain,
                "lengths": [round(bones[n].length, 4) for n in chain],
            }
result = {"total_bones": len(bones), "digit_chains": digits}
Real output for this character, one digit shown:
{
  "total_bones": 400,
  "digit_chains": {
    "f_index.L": {
      "bones": ["DEF-f_index.01.L", "DEF-f_index.02.L", "DEF-f_index.03.L"],
      "lengths": [0.2638, 0.1609, 0.1247]
    }
  }
}
All ten digits returned three bones. That is the pass condition.
The thumb is a separate problem. It gets three bones like the others here (0.2376 / 0.1562 / 0.1344), but anatomically the thumb's base joint is a saddle joint that rotates across the palm. That is opposition, and it is how A differs from S, and how F and O are formed at all. The animation system models it as two extra parameters, thumbOpp (rotating across the palm) and thumbAbd (swinging away from the hand), rather than pretending it is a fourth finger.
Sourcing a character (BlendSwap and licensing)
The character for this project came from BlendSwap, a library of user-uploaded .blend files.
Read the licence before you download, not after you have built on it. BlendSwap uploads carry per-file licences, usually a Creative Commons variant:
CC-0: Public domain, no conditions.
CC-BY: Attribution required.
CC-BY-SA: Attribution, and derivatives must share alike.
CC-BY-NC: Non-commercial only.
The distinction that catches people out is NC. If your project might ever be commercial, a CC-BY-NC character is a dead end, and you will discover that after the work is done.
Worth noting for this project specifically: ASL-LEX 2.0 is itself CC BY-NC 4.0. So the sign data already constrains this project to non-commercial use, independent of the character. That is a licence decision that ripples through everything, and it is the kind of thing to check on day one rather than day thirty.
Practical sourcing advice:
Prefer characters that already ship with a Rigify rig. Rigging a bare mesh well is a skill, and doing it badly costs more time than finding a better character.
Open it and run the checklist before you commit. A render tells you nothing about topology.
Keep the original file untouched somewhere. This project relied on Blender's own .blend1 rotation as a safety net more than once.
Facial topology: what a real mouth opening means
This is the requirement people skip, and it is the one that cannot be worked around.
A character can have a beautifully sculpted face that is a closed surface, with lips modelled as a seam and eyes as painted-on geometry. It renders fine. It cannot blink, and it cannot open its mouth, because there is nothing there to open.
You detect real openings by looking for boundary edges, edges with exactly one connected face. A closed mesh has none. A hole has a loop of them.
import bpy, bmesh
from mathutils import Vector
o = bpy.data.objects["head"]
bm = bmesh.new()
bm.from_mesh(o.data)

boundary = [e for e in bm.edges if len(e.link_faces) == 1]
# ... group connected boundary edges into loops, then take each loop's centroid
Real output for this head, sorted top to bottom:
Loop 1: left eye opening: 16 verts. Centre (0.269, -0.487, 10.098).
Loop 2: right eye opening: 16 verts. Centre (-0.269, -0.487, 10.098).
Loop 3: mouth opening: 20 verts. Centre (0.000, -0.629, 9.529).
Loop 4: neck: 22 verts. Centre (0.000, 0.428, 8.873).
Four real holes. The face can blink and speak.
These centroids became the code's anatomy constants
Here is the part I want to draw out, because it is the single best practice in this project.
blender/facial_morphs.py opens with:
# --- anatomy, measured from the head mesh ------------------------------------
EYE_L = Vector((0.269, -0.487, 10.098))   # +x is the character's left
EYE_R = Vector((-0.269, -0.487, 10.098))
EYE_RX, EYE_RZ = 0.134, 0.053             # eye opening half-extents
BROW_Z = 10.262
MOUTH = Vector((0.0, -0.629, 9.529))
MOUTH_HALF_W = 0.127
Compare those to the boundary loop centroids above. They are the same numbers.
EYE_L is the centroid of the left eye's boundary loop. MOUTH is the centroid of the mouth's. The comment measured from the head mesh is literally true, since the constants were read off the geometry, not eyeballed in the viewport.
Quad topology
Same query, face statistics:
{"tris": 0, "quads": 984, "ngons": 2, "total_verts": 1026}984 quads, zero triangles, two n-gons.
Why quads matter here: the head has a Subdivision Surface modifier. Catmull-Clark subdivision on clean quads produces predictable, smooth results. Triangles and n-gons produce pinching and uneven density exactly where they sit. Two n-gons in a 986-face mesh is fine, since they are almost certainly on the back of the scalp, hidden under hair.
Performance note: 1,026 vertices is the cage. After Subdivision at level 2 the exported head is far denser. The cage is what you author; the subdivided result is what ships. Do not judge a character's cost by its cage count, and do not judge its topology by the subdivided result.
Hands and fingers
The hands are a separate mesh object:
{
  "hands_mesh": {
    "verts": 691,
    "modifiers": [["Mirror", "MIRROR"], ["Armature", "ARMATURE"]],
    "materials": ["Material.007"]
  }
}
691 vertices for both hands, with a Mirror modifier, so only one hand is actually modelled, and the other is generated.
691 vertices for two hands is lean. That is a deliberate tradeoff by whoever modelled it: the hands read correctly in silhouette and deform acceptably, without the density you would want for close-up film work. For ASL, silhouette is the information (you read handshape from the outline) so this is the right place to be economical.
The arm chain and twist bones
{
  "DEF-upper_arm.L":     0.7139,
  "DEF-upper_arm.L.001": 0.7139,
  "DEF-forearm.L":       0.7592,
  "DEF-forearm.L.001":   0.7592,
  "DEF-hand.L":          0.4382
}
The upper arm and forearm are each split into two equal segments. These are twist bones.
Why they exist: when you rotate a real forearm, the twist distributes gradually from elbow to wrist. A single bone rotating the whole forearm produces the candy wrapper pinch at one end. Splitting the segment and distributing the roll fixes it.
What this means for the animation code: the IK solve targets the wrist, but the chain from shoulder to wrist passes through four bones, not two. The rig binding accounts for this by measuring the real segment lengths through the twist bones:
/** shoulder-joint -> elbow and elbow -> wrist, following the twist bones */
l1: number;
l2: number;Bones and rigging
{
  "total_bones": 400,
  "bone_name_prefixes": {
    "DEF-": 71, "MCH-": 136, "ORG-": 65, "(other)": 128
  }
}
400 bones, of which only 71 actually deform the mesh. The character also still has its metarig in the file alongside the generated rig, which is the standard Rigify workflow.
The four groups:
ORG- (65): A copy of your original metarig bones. Reference layer.
MCH- (136): Mechanism bones. They drive constraints and IK/FK switching. Invisible plumbing.
DEF- (71): The deform bones. These are the only ones with vertex groups.
Other (128): The control bones you actually grab in the viewport.
Why so many for so few: Rigify trades bone count for usability. Every convenience, an IK/FK switch, a stretchy limb, a finger curl slider, costs mechanism bones. That is a good deal for animators and irrelevant at runtime, because only the 71 deform bones ship.
The consequence for export: you want to export 71 bones out of 400, and that is where the trap is.
The DEF-bone hierarchy trap
Covered in Part 1 and Part 2, restated here because it is the single most expensive gotcha in this pipeline:
{
  "DEF-f_index.01.L": "ORG-palm.01.L",
  "DEF-f_index.02.L": "DEF-f_index.01.L",
  "DEF-hand.L":       "DEF-forearm.L.001"
}
DEF-f_index.01.L, the base of the index finger, is parented to ORG-palm.01.L, which is not a deform bone.
Export deform bones only and that parent is excluded. The finger is orphaned. The GLB loads without error and the fingers float away from the hand.
The exporter's own docstring says it plainly:
1. build a clean export armature that contains only the 71 deform bones,
   re-parented into a proper single-root hierarchy (in the source Rigify rig
   the DEF bones hang off ORG-/MCH- bones, so a plain "deform bones only"
   export silently detaches the fingers from the hand),
The fix walks up through the Rigify twins, and is shown in full in Part 1.
Modifying colours
The character has 14 materials. Here is what is actually in them:
Material.009: Base colour 0.584, 0.245, 0.191 linear. Roughness 0.749. Used by head and eyes.
Material.007: Base colour 0.555, 0.245, 0.191 linear. Roughness 0.749. Used by hands.
Material.006: Base colour 0.010, 0.010, 0.010. Roughness 0.505. Used by eyelasshes, hair, Plane.
Material.003: Base colour 0.000, 0.000, 0.000. Roughness 0.905. Used by 6 hoodie and trouser meshes.
Material.010: Base colour 1.000, 1.000, 1.000. Roughness 0.020. Assigned to no meshes.
A caution on reading that list: Blender's users count is datablock references, not mesh assignments. Material.010 reports 4 users but is assigned to zero meshes. If you want to know what a material actually paints, iterate the meshes and read o.data.materials. Do not trust the user count.
The trap is sharing. Look at Material.009: it is on both head and eyes. Change the skin tone and you change the eyeballs to match. Same story with Material.006, since the eyelashes, the hair, and the eyebrow strip are one material, so you cannot retint the brows without recolouring the hair.
To change one part only, you must first break the link:
import bpy
o = bpy.data.objects["eyes"]
o.data.materials[0] = o.data.materials[0].copy() # now independentMaterial.012, .013 and .014 are pure red, blue and green with one user each: leftover test materials. Harmless, but a reminder that a downloaded .blend has archaeology in it.
Shape keys: there were none
{"mesh_objects": 147, "meshes_with_shape_keys": [], "meshes_without_shape_keys": 147}Zero shape keys across every mesh in the file.
ASL grammar lives on the face. Raised brows mark a yes/no question. Furrowed brows mark a wh-question. Mouth morphemes carry adverbial meaning that the hands do not. Without shape keys, none of that can be expressed.
The decision: generate them procedurally rather than sculpt them.
blender/facial_morphs.py builds 20 morphs at export time as radial-falloff displacement fields anchored to the measured anatomy constants:
browRaise, browFurrow, browRaiseInner,
blinkL, blinkR, squint, eyeWide,
gazeL, gazeR, gazeUp, gazeDown,
jawOpen, mouthSmile, mouthFrown, mouthPucker,
mouthPress, mouthWide, mouthTH, cheekPuff, noseWrinkle
Why generated:
Reproducible. Re-run the script, get the same morphs.
Survives mesh changes. Edit the face, re-export, morphs regenerate against the new geometry.
I am not a character artist. Twenty hand-sculpted shape keys is a day of skilled work I would have to redo whenever anything changed.
The tradeoff, honestly: generated morphs are cruder than sculpted ones, and they have a failure mode sculpted shapes do not. A falloff field centred slightly wrong deforms geometry it should never touch, and because it is a smooth field, it does so plausibly enough that you do not notice until you drive it hard.
That bit me twice. The brow-raise field had no lower bound and reached from the brow down past the bottom of the eye opening, so raising the brows dragged the eyelid skin up. Article 9 covers both cases with the measurements.
Morphs are role-scoped
The face is four separate meshes, and they must not all receive the same morphs:
FACE_MESH_ROLES = {
    "head": "skin",
    "Plane": "brows",       # the eyebrow strip
    "eyelasshes": "lashes",  # rides the upper lid
    "eyes": "eyeballs",     # rigid spheres, gaze rotation only
}

_ROLE_ALLOW = {
    "brows": {"browRaise", "browFurrow", "browRaiseInner"},
    "lashes": {"blinkL", "blinkR", "squint", "eyeWide"},
    "eyeballs": {"gazeL", "gazeR", "gazeUp", "gazeDown"},
}
Why: the eyeballs are rigid spheres. They rotate for gaze; they must never be squashed by a smile. Applying a general displacement field to them turns them into eggs.
The subtle consequence: scoping creates the possibility of meshes that should move together drifting apart. The lashes carry lid morphs but not brow morphs, so a brow field that leaks onto the lid moves the skin and leaves the lashes behind. Which is precisely the bug mentioned above.
Note the spelling eyelasshes. That is the original author's mesh name. Match it exactly rather than fixing it. Renaming meshes in a file you did not model breaks things you cannot see.
Exporting to GLB
The export is non-destructive by design. Its docstring:
Nothing in this script touches the original character data.  Everything happens
on duplicates inside a temporary collection which is deleted at the end
The four stages:
1. build a clean export armature   71 deform bones, re-parented to one root
2. duplicate every visible mesh    apply all non-armature modifiers
3. generate facial morphs          on the resulting dense meshes
4. bind + write                    GLB + rig_manifest.json
Choosing what to export
source_meshes = [
    o for o in bpy.data.objects
    if o.type == "MESH"
    and not o.name.startswith("WGT")
    and o.name not in SKIP_MESHES
    and o.parent is src_rig
]
Four filters, and each one earns its place.
Bone naming
def clean_bone_name(name):
    """DEF-f_index.01.L -> f_index_01_L  (dot-free, three.js friendly)."""
    if name.startswith("DEF-"):
        name = name[4:]
    return name.replace(".", "_")
Why: dots are property-path separators in several toolchains, and a bone called DEF-f_index.01.L is awkward to address. Stripping the prefix and flattening dots gives clean identifiers on the other side.
Optimisation
The vertex budget is enforced at export, and it is adaptive rather than a flat cap:
MULTIRES_CAP = 2
SUBSURF_CAP = 2
MAX_VERTS_PER_MESH = 10000 # per-garment budget for multires subdivisionif m.type == "MULTIRES":
# each level quadruples the face count; keep every garment under a
# sane budget instead of using one flat cap for all of them
lvl = min(MULTIRES_CAP, m.total_levels)
while lvl > 0 and len(ob.data.vertices) * (4 ** lvl) > MAX_VERTS_PER_MESH:
lvl -= 1
m.levels = lvl
m.render_levels = lvl
m.sculpt_levels = lvl
if m.type == "SUBSURF":
m.levels = min(SUBSURF_CAP, m.levels)How it works: each subdivision level quadruples face count, so cost is verts * 4^level. The loop steps the level down until the projected count fits the budget.
Why adaptive instead of a flat level: a flat cap of 2 is wrong in both directions. A dense garment at level 2 explodes; a 20-vertex eyebrow strip at level 2 is still only 320 vertices and needs the detail. Budgeting by resulting vertex count treats every mesh on its own terms.
Real subdivision levels in the source file:
head: Viewport 2, render 2.
eyelasshes: Viewport 1, render 2.
Plane: Viewport 1, render 2.
shoes: Viewport 1, render 2.
pocets: Viewport 2, render 2.
Note viewport and render levels differ. Export follows the render level, not what you see. A mesh that looks light in the viewport can be four times heavier in the export.
Where it landed
GLB               10.6 MB
Meshes            21
Vertices          137,648
Bones             71
Morph targets     20 (on 4 face meshes)
Page bundle       293 kB
First Load JS     381 kB
Honest assessment: the GLB is the bottleneck. 10.6 MB dominates load time, and the JavaScript is 381 kB, a factor of 28 smaller. If I were optimising for load, the character is the only thing worth touching.
What I would do, roughly in order of return:
- 1
Draco or meshopt compression: Geometry compression on a 137k-vertex mesh typically pays for itself several times over. This is the obvious first move and I have not done it.
- 2
Drop clothing subdivision: The hoodie and trousers carry a large share of those vertices and nobody is looking at them. ASL readability lives in hands and face.
- 3
Texture audit: The file carries a face_color image at 2048x2048. At the framing this app uses (the character occupies part of a browser viewport, and the face is a fraction of that) 1024 squared would very likely be indistinguishable and a quarter of the memory.
What I would not cut: face and hand density. That is where the signal is. Optimising the parts a viewer actually reads is a false economy for an ASL character.
Production note: the morph targets are on 4 meshes only (head, eyes, eyelasshes, Plane), which keeps the morph data small. Morph targets store per-vertex deltas, so applying 20 of them to the full 137k-vertex character instead of just the face would have been a serious cost.
Key Takeaways
- 1
Check topology before you commit to a character: Three bones per finger, real eye and mouth openings, complete weights. A render tells you none of this.
- 2
Boundary edges prove a face can move: Loops of single-face edges are real openings; a closed mesh cannot blink.
- 3
Measure your anatomy constants from the mesh: EYE_L and MOUTH in this project are literally the boundary-loop centroids, and that removes a whole class of morph bug.
- 4
Three phalanges are non-negotiable for ASL: Two-bone fingers cannot distinguish a bent finger from a curved one, and handshapes collapse.
- 5
Twist bones split your arm chain: Compute reach through them or your IK thinks every target is out of range.
- 6
Rigify's 400 bones are 71 deform bones plus plumbing: The deform bones are parented through non-deform ones, which silently detaches fingers on export.
- 7
Materials are shared: head and eyes are one material here; copy before retinting.
- 8
Exclude WGT- widgets: 128 of the 155 objects in this file are control shapes.
- 9
Budget subdivision by resulting vertex count: Not by a flat level. One cap is wrong for both a dense garment and a 20-vertex eyebrow strip.
- 10
Check the licence first: ASL-LEX being CC BY-NC already constrains this project; a NC character would too.
Resources
BlendSwap: blendswap.com (https://blendswap.com). Check the per-file licence before downloading.
Creative Commons licences: creativecommons.org/licenses (https://creativecommons.org/licenses/). Pay attention to NC and SA.
Rigify: Blender manual, Rigging → Rigify. Covers the DEF-, ORG-, MCH- convention and the metarig workflow.
glTF 2.0 specification: Khronos Group. Sections on skins, morph targets, and the Y-up coordinate system.
Draco and meshopt: Geometry compression extensions for glTF, the first thing to try on a 10 MB character.
Blender manual: Modifiers → Subdivision Surface: Viewport vs render levels, and why they differ.
ASL-LEX 2.0: Sevcikova Sehyr, Caselli, Cohen-Goldberg and Emmorey (2021), CC BY-NC 4.0.
The rest of the series
This is Part 3 of a 10-part series. The other parts:
- 1
How I Built an AI-Powered ASL Sign Character with Claude Code
- 2
How Blender MCP Works with Claude Code
- 3
Designing the Goal Prompt
- 4
Loop Engineering Explained
- 5
Building Natural ASL Animation
- 6
Project Folder Architecture
- 7
Every Prompt Used During Development
- 8
Common Problems We Solved
- 9
Lessons Learned
Frequently Asked Questions
What does a 3D character need in order to sign ASL?
Three bones per finger on all ten digits, a deform skeleton that forms one connected tree, real eye and mouth openings in the face mesh (boundary edge loops, not painted detail), and complete skin weights. Miss any of them and you will be rebuilding the character rather than the animation system.
Why do fingers need three bones?
ASL distinguishes bent from curved handshapes. X is hooked at the distal joint; bent-V is flexed at the middle joints with straight tips. Two bones per finger cannot express the difference, so distinct handshapes become indistinguishable.
How do I check whether a face mesh can actually blink?
Look for boundary edges, which are edges with exactly one connected face. Group them into loops and take each loop's centroid. This character has four: two eyes, a mouth, and the neck. A closed surface has none and cannot open anything.
Can I use a BlendSwap character commercially?
Depends entirely on the file's licence. CC-0 and CC-BY are fine; CC-BY-NC is not. Check before building. Note that this project is non-commercial regardless, because ASL-LEX 2.0 is itself CC BY-NC 4.0.
Why does my glTF export detach the fingers?
Rigify parents DEF- bones to ORG- and MCH- bones. A deform bones only export drops those parents and orphans the children, with no error. Rebuild a deform-only hierarchy first, reparenting each deform bone to its nearest deform ancestor via the ORG- to DEF- twin naming.
Should I sculpt shape keys or generate them?
Sculpted shapes look better. Generated ones are reproducible, survive mesh edits, and do not require character-art skill. This project generated 20 because the character shipped with zero and the mesh was still changing. The cost is that a mis-centred falloff field deforms geometry it should not, plausibly enough that you will not notice immediately.
How big should the GLB be?
Smaller than this one. At 10.6 MB the character dominates load time; the entire JavaScript bundle is 381 kB. Geometry compression (Draco or meshopt) is the obvious first optimisation, followed by cutting clothing subdivision. Keep face and hand density; that is where the meaning is.
Do the 400 bones all get exported?
No: 71. The rest are Rigify's control and mechanism bones, which exist for animator convenience and have no runtime role. Similarly, 128 of the 155 objects are WGT- control widgets and are excluded by name.
If you are building 3D characters that need to hold up in a real product (accessible, performant, browser-deliverable) that is exactly the kind of web application engineering we ship at ETechViral. The next part of the series covers the goal prompt that got Claude to build the animation system on top of this character.
- Blender
- Rigify
- Character Rigging
- glTF
- Shape Keys
- Topology
- Three.js
- BlendSwap
Related articles

How I Built an AI-Powered ASL Sign Character with Claude Code
A real engineering breakdown of a 3D character that signs any English sentence in ASL, synthesised at runtime from the ASL-LEX 2.0 phonological database, driven by analytic IK in three.js, with no pre-recorded animation.
22 min read
How Blender MCP Works with Claude Code
Connecting Claude Code to a live Blender session over MCP: how to inspect bones, shape keys, materials and animations in a real Rigify character, with the actual queries, outputs, failure modes and debugging techniques.
16 min read
Common Problems We Solved
Twenty-five real bugs from a production ASL animation system: hands through the chest, fingers hyperextending, a limit cycle in the collision solver, a measurement that lied, with the root cause and fix for each.
18 min read