How Blender MCP Works with Claude Code
Connecting Claude Code to a live Blender session over MCP: how to inspect bones, shape keys, materials and animations in a real Rigify character, with the actual queries, outputs, failure modes and debugging techniques.
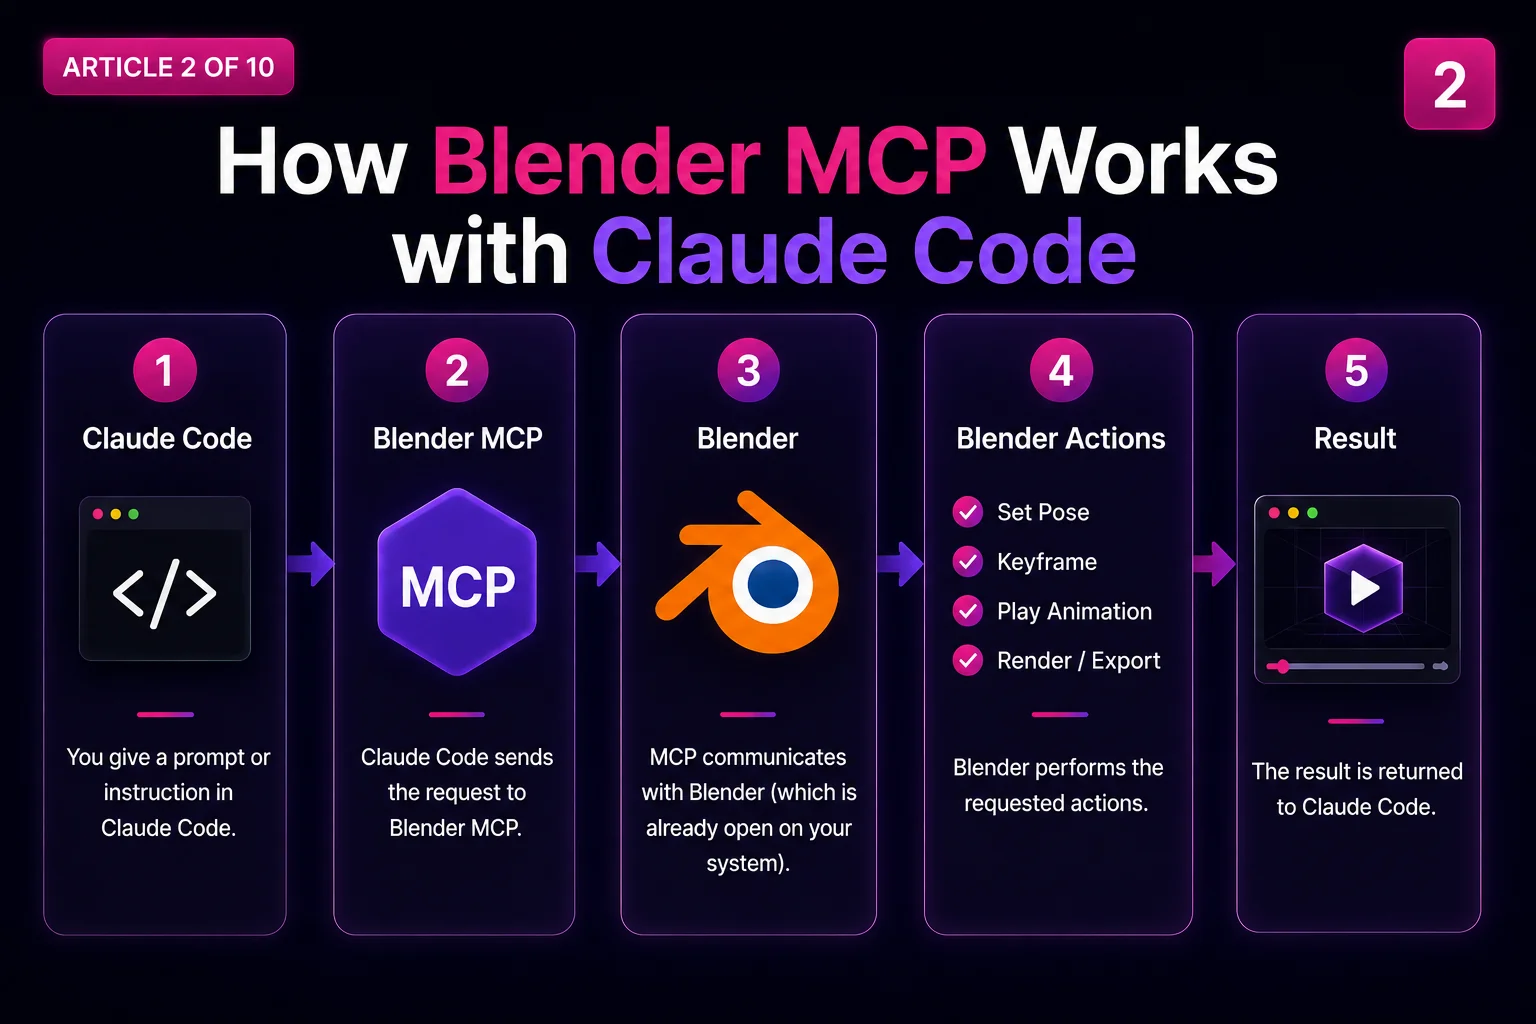
MCP (Model Context Protocol) lets Claude call tools in another program. A Blender MCP server exposes Blender's Python API as tools, so Claude can inspect and script a live, already-open Blender session instead of guessing at your scene.
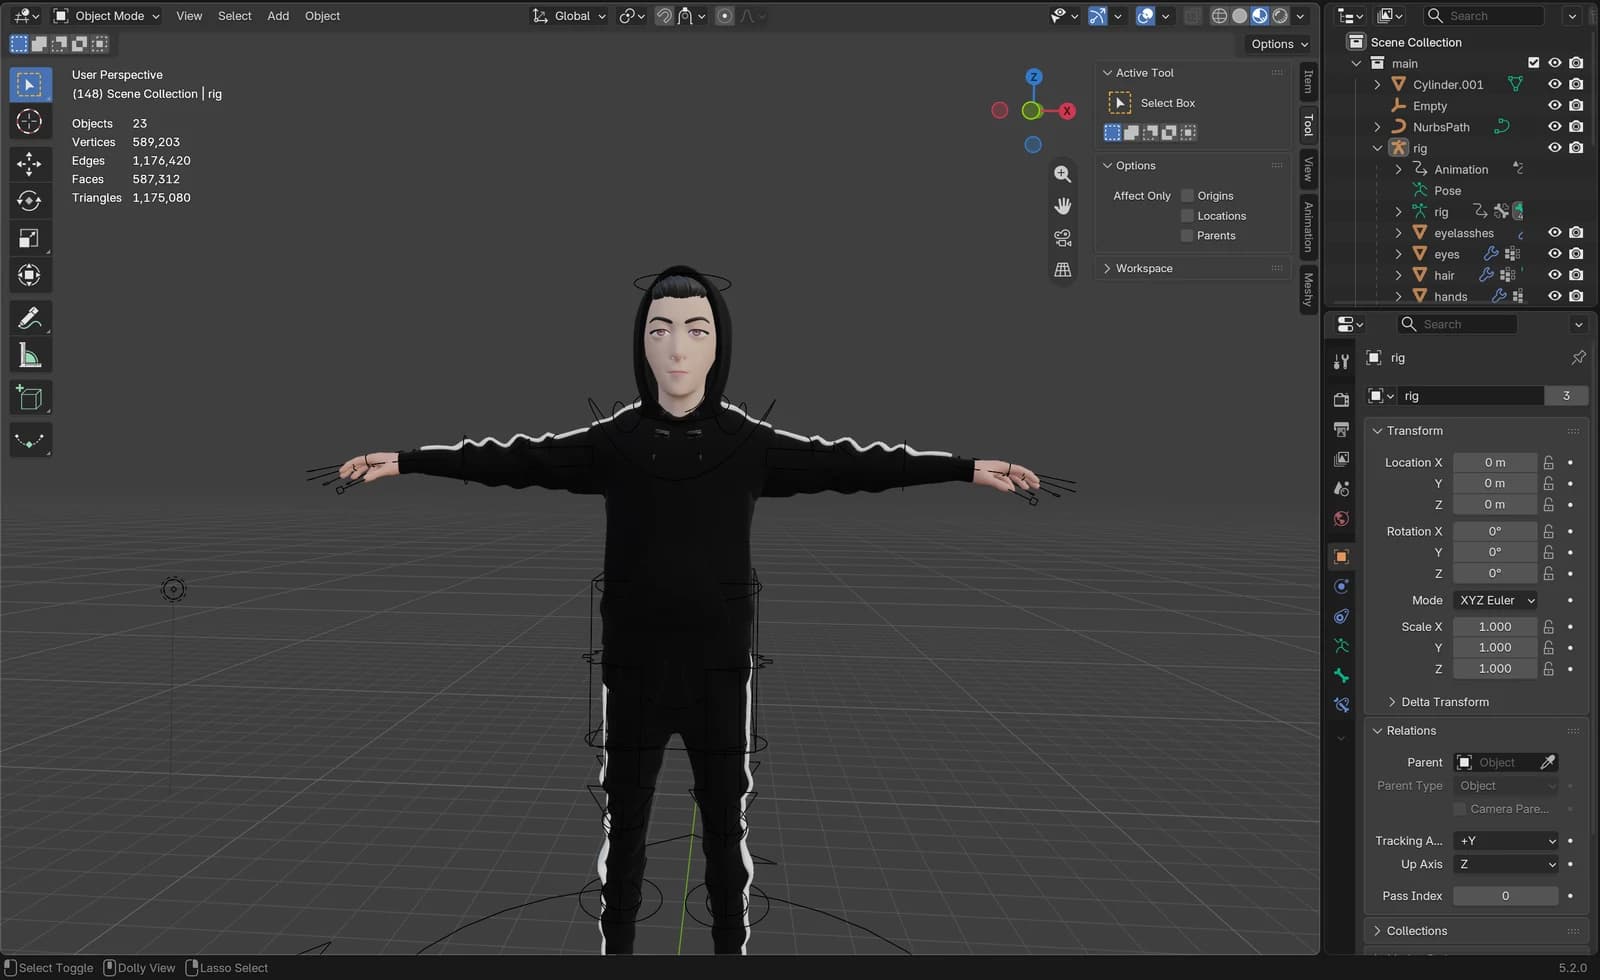
For the ASL Sign Character project this mattered for one reason: the character already existed (see Part 1 for the full project overview). I needed to know what was actually in the rig, bone names, hierarchy, shape keys, modifiers, before writing a single line of animation code. Guessing bone names is how you write 500 lines against a skeleton that does not exist.
This article covers the setup, the queries that were actually useful, and the failure modes that cost me time. Everything shown here was run against the real project file.
What this is running on
For reference, the environment these examples came from:
Blender          5.2.0 LTS  (branch: blender-v5.2-release)
Python           3.13.13
Platform         macOS
MCP addon        bl_ext.user_default.mcp  v1.0.0
Rigify           0.6.10
Note the addon module path: bl_ext.user_default.mcp. The bl_ext. prefix means it is installed as a Blender Extension, not a legacy add-on. That distinction matters for where you install it and how you enable it, and it is the modern path in Blender 4.2 and later.
Installing Blender
Download from blender.org/download. Take an LTS release if you have a choice, since LTS builds get two years of fixes, and you do not want the renderer changing under a project mid-build.
Verify the version from inside Blender's Python console, because the splash screen sometimes lies about patch releases:
import bpy, sys
print(bpy.app.version_string)   # '5.2.0 LTS'
print(sys.version.split()[0])   # '3.13.13'
Why the Python version matters: any package you install into Blender's Python must match that interpreter. Blender ships its own Python; it is not your system Python and it is not your virtualenv.
Downloading Claude Desktop
Get it from claude.ai/download (macOS and Windows).
For this project I drove Blender from Claude Code, not Claude Desktop. Both speak MCP and both can connect to the same server. The practical difference:
Claude Desktop: Conversational. Good for exploring a scene and asking questions about it.
Claude Code: Has the filesystem and a shell. Necessary here, because the work was write a Python script to disk, run it inside Blender, read the exported GLB back in a web app. Claude Desktop cannot do the file and shell half of that.
If you are following this series, use Claude Code. The Blender half is identical either way.
Installing the Blender MCP addon
For reference, the official Blender MCP server page is the authoritative starting point, with the current install instructions and links to the source.
The general install path for a Blender Extension:
- 1
Edit → Preferences → Get Extensions to install from the extensions platform, or Install from Disk for a local .zip.
- 2
Enable the extension's checkbox.
- 3
Start its server (most expose a panel or an operator, check the addon's own docs for where).
Confirm it is actually enabled by asking Blender rather than trusting the checkbox:
import addon_utils
for m in addon_utils.modules():
    if addon_utils.check(m.__name__)[1]:
        print(m.__name__, (m.bl_info or {}).get("name"))
Real output from this project, filtered to the interesting lines:
bl_ext.user_default.mcp      MCP
rigify                       Rigify
io_scene_gltf2               glTF 2.0 format
Why check this way: addon_utils.check() returns (loaded_default, loaded_state). The second element is whether it is enabled right now. A greyed checkbox in the UI and a failed import look identical at a glance.
Enabling online access
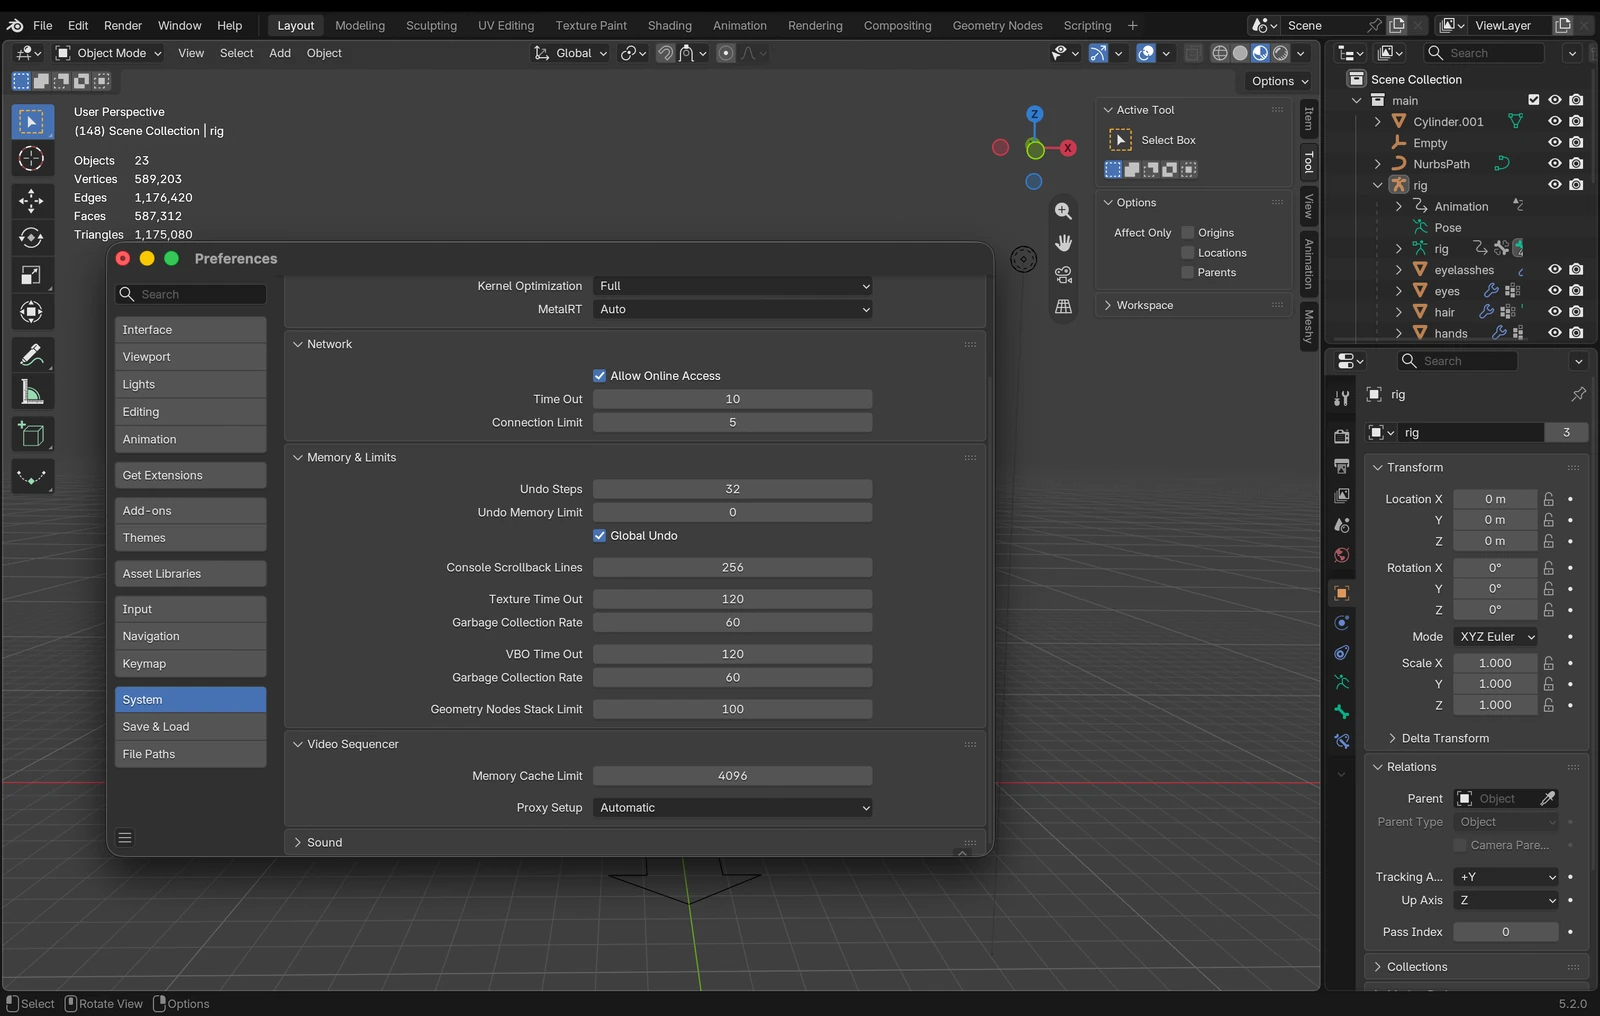
Blender 4.2 and later ships an Online Access preference that is off by default. When it is off, extensions are blocked from making network connections.
Edit → Preferences → System → Network → Allow Online Access.
You need it on to browse and install from the extensions platform. Whether you need it on for the MCP server itself depends on how that server communicates. A local socket on localhost is not the same thing as internet access.
Why it is off by default: Blender made network access opt-in so that installed add-ons cannot phone home without consent. Leave it off if you install extensions manually from disk and your MCP server is purely local.
Connecting Claude to Blender
MCP servers are registered in the client's config.
Claude Code manages servers through its CLI:
claude mcp list
claude mcp --help
I am deliberately not writing an exact add command with flags here. The syntax varies by transport (stdio vs HTTP) and by Claude Code version, and a wrong command copied from a blog post is a frustrating way to spend twenty minutes. Run claude mcp --help and use what your version documents.
Claude Desktop uses a JSON config file, reachable from Settings → Developer → Edit Config. The shape is:
{
  "mcpServers": {
    "blender": {
      "command": "...",
      "args": ["..."]
    }
  }
}
Fill command and args from your MCP package's own README.
Verifying the connection
Do not trust a green dot. Ask Blender something only a live session could answer:
import bpy
result = {
    "filepath": bpy.data.filepath,
    "objects": len(bpy.data.objects),
    "version": bpy.app.version_string,
}
Real response from this project:
{
  "filepath": "/Users/.../my sign character.blend",
  "objects": 155,
  "version": "5.2.0 LTS"
}
If you get the right file path back, you are connected to the session you think you are connected to. That check is worth doing every time you have two Blender windows open.
The tool surface
The server this project used exposes tools in these groups:
Execution: execute_blender_code. Runs arbitrary bpy Python.
Scene: get_objects_summary, get_object_detail_summary. Collections, hierarchy, per-object detail.
File: get_blendfile_summary_datablocks and variants for path info, missing files, linked libraries, usage guess. File-level facts.
Docs: search_api_docs, search_manual_docs, get_python_api_docs. Bundled API and manual reference.
Viewport: get_screenshot_of_window_as_image, get_screenshot_of_area_as_image, render_viewport_to_path, render_thumbnail_to_path. Visual feedback.
Navigation: jump_to_view3d_object_by_name, jump_to_tab_by_name and variants. Drive the UI.
Most also have a _for_cli variant for headless or background Blender.
How execute_blender_code returns data
Assign to a variable named result. It must be JSON-serialisable.
import bpy
result = {"bones": len(bpy.data.objects["rig"].data.bones)}Inspecting bones
This is the query that shaped the whole project.
import bpy
arm = bpy.data.objects["rig"]
bones = arm.data.bones
defs = [b.name for b in bones if b.name.startswith("DEF-")]

prefixes = {}
for b in bones:
    p = b.name.split("-")[0] + "-" if "-" in b.name[:4] else "(other)"
    prefixes[p] = prefixes.get(p, 0) + 1

parents = {}
for n in ["DEF-f_index.01.L", "DEF-f_index.02.L", "DEF-hand.L", "DEF-forearm.L"]:
    b = bones.get(n)
    if b:
        parents[n] = b.parent.name if b.parent else None

result = {
    "total_bones": len(bones),
    "deform_bones": len(defs),
    "bone_name_prefixes": prefixes,
    "def_bone_parents": parents,
}
Real output:
{
  "total_bones": 400,
  "deform_bones": 71,
  "bone_name_prefixes": {
    "(other)": 128, "DEF-": 71, "MCH-": 136, "ORG-": 65
  },
  "def_bone_parents": {
    "DEF-f_index.01.L": "ORG-palm.01.L",
    "DEF-f_index.02.L": "DEF-f_index.01.L",
    "DEF-hand.L": "DEF-forearm.L.001",
    "DEF-forearm.L": "DEF-upper_arm.L.001"
  }
}
Look at DEF-f_index.01.L. Its parent is ORG-palm.01.L, not a deform bone.
That single line is the most valuable thing Blender MCP told me in this project. It means a deform-bones-only glTF export silently detaches every finger from the hand, because the parent gets excluded from the export and the child is orphaned. No error. The GLB loads. The fingers float.
blender/export_character.py exists mostly to fix this, walking up through the Rigify ORG- and MCH- twins to find a real deform ancestor for every deform bone. Article 1 shows that function; Article 3 covers the export in full.
Inspecting shape keys
The question I needed answered: does this character have a facial rig?
import bpy
meshes = [o for o in bpy.data.objects if o.type == 'MESH']
with_keys, without_keys = [], 0
for o in meshes:
    sk = o.data.shape_keys
    if sk:
        with_keys.append({"object": o.name, "keys": [k.name for k in sk.key_blocks]})
    else:
        without_keys += 1
result = {
    "mesh_objects": len(meshes),
    "meshes_with_shape_keys": with_keys,
    "meshes_without_shape_keys": without_keys,
}
Real output:
{
  "mesh_objects": 147,
  "meshes_with_shape_keys": [],
  "meshes_without_shape_keys": 147
}
Zero shape keys across all 147 meshes. ASL non-manual markers (brow raise for yes/no questions, brow furrow for wh-questions, mouth morphemes) had nothing to drive.
That answer changed the plan. It is why blender/facial_morphs.py exists, generating 20 morphs procedurally from face geometry at export time.
Inspecting materials and modifiers
Materials and modifiers came from the same query, because for this project they answered one combined question: what will the exported geometry actually look like?
import bpy
face = {}
for n in ["head", "eyes", "eyelasshes", "Plane"]:
    o = bpy.data.objects.get(n)
    if o and o.type == 'MESH':
        face[n] = {
            "verts": len(o.data.vertices),
            "shape_keys": (len(o.data.shape_keys.key_blocks) if o.data.shape_keys else 0),
            "materials": [m.name for m in o.data.materials if m],
            "modifiers": [(m.name, m.type) for m in o.modifiers],
            "vertex_groups": len(o.vertex_groups),
        }
result = {"face_meshes": face, "total_materials": len(bpy.data.materials)}
Real output:
{
  "face_meshes": {
    "head": {
      "verts": 1026, "shape_keys": 0, "materials": ["Material.009"],
      "modifiers": [["Subdivision", "SUBSURF"], ["Armature", "ARMATURE"]],
      "vertex_groups": 71
    },
    "eyes": {
      "verts": 642, "shape_keys": 0, "materials": ["Material.009"],
      "modifiers": [["Armature", "ARMATURE"]], "vertex_groups": 71
    },
    "eyelasshes": {
      "verts": 36, "shape_keys": 0, "materials": ["Material.006"],
      "modifiers": [["Solidify", "SOLIDIFY"], ["Subdivision", "SUBSURF"], ["Armature", "ARMATURE"]],
      "vertex_groups": 71
    },
    "Plane": {
      "verts": 20, "shape_keys": 0, "materials": ["Material.006"],
      "modifiers": [["Solidify", "SOLIDIFY"], ["Subdivision", "SUBSURF"], ["Armature", "ARMATURE"]],
      "vertex_groups": 71
    }
  },
  "total_materials": 14
}
Three things worth pulling out of that.
- 1
The base cages are tiny: Plane (the eyebrow strip) is 20 vertices. eyelasshes is 36. head is 1,026. Those are pre-subdivision counts.
- 2
Materials are shared across meshes: head and eyes both use Material.009. Renaming or retinting one changes both. Article 3 covers what that meant when adjusting colours.
- 3
Every mesh has an Armature modifier and 71 vertex groups: One per deform bone. Consistent, and it confirms the skinning is intact.
That first point changed how blender/body_profile.py works. It fits elliptical collision cross-sections to the mesh, and fitting them to a 20-vertex cage produces garbage. The profile is fitted to the evaluated (modifier-applied) mesh instead:
deps = bpy.context.evaluated_depsgraph_get()
eval_obj = obj.evaluated_get(deps)
mesh = eval_obj.to_mesh()
Why: obj.data.vertices gives you the cage. evaluated_get(depsgraph) gives you what is actually on screen after Subdivision and Solidify. For anything measuring real geometry, you want the second.
The object-name vs data-name trap
get_object_detail_summary on the head returns:
{
  "name": "head",
  "type": "MESH",
  "data_name": "Plane.004",
  "parent": "rig",
  "dimensions": [1.175, 1.696, 2.271],
  "modifiers": [
    {"name": "Subdivision", "type": "SUBSURF"},
    {"name": "Armature", "type": "ARMATURE"}
  ],
  "materials": ["Material.009"],
  "collections": ["main"]
}
The object is called head. Its mesh datablock is called Plane.004.
Why this matters: bpy.data.objects["head"] and bpy.data.meshes["head"] are different lookups, and the second one raises KeyError here. Scripts that assume the names match break on real production files, where meshes are usually named after whatever primitive they started as.
The export script keys off object names with an explicit role mapping rather than trusting either:
FACE_MESH_ROLES = {
    "head": "skin",
    "Plane": "brows",       # the eyebrow strip
    "eyelasshes": "lashes",  # rides the upper lid
    "eyes": "eyeballs",     # rigid spheres, gaze rotation only
}
Note eyelasshes: the original author's spelling. Do not silently fix names in a file you did not model; match them exactly.
Inspecting animations
import bpy
result = {
    "actions_in_file": [{"name": a.name, "fcurves": len(a.fcurves)} for a in bpy.data.actions],
    "frame_range": [bpy.context.scene.frame_start, bpy.context.scene.frame_end],
}
Real output:
{
  "actions_in_file": [],
  "frame_range": [1, 250]
}
Zero actions. The frame range is Blender's untouched default.
This confirmed the premise of the project: there is no baked animation anywhere. Every frame in the finished app is synthesised at runtime in TypeScript. The .blend supplies geometry and a skeleton, nothing more.
How actions work: bpy.data.actions holds every action in the file, whether or not it is assigned. Something can be assigned via obj.animation_data.action. An action with zero F-curves is an empty container. Check len(a.fcurves), not just the action's existence.
Reading the bundled documentation
The server bundles Blender's Python API reference and user manual as searchable text. That is more useful than it sounds, because it grounds answers in your Blender version instead of whatever version was in the training data.
search_api_docs(query="bpy.types.Object", max_results=2)Returns ranked hits with path, text, breadcrumb, score.
The gotcha that wasted my time: the query is tokenised on whitespace and every token must appear in the paragraph, the file path, or an enclosing section title. It is an AND match, not fuzzy search.
These returned zero hits:
"shape key blocks mesh"      -> {"hits": [], "truncated": false}
"shape_keys key_blocks"      -> {"hits": [], "truncated": false}
This worked:
"bpy.types.Object" -> 2 hitsWhy: no single paragraph contained all of shape, key, blocks and mesh as separate tokens. Common stop-words are dropped, so natural phrasing works, but unusual token combinations silently return nothing.
Common problems
The server is connected but the scene is empty
You are attached to a different Blender instance, usually a second window, or a fresh Blender that opened on startup. Check bpy.data.filepath. If it is an empty string, that session never opened a file.
execute_blender_code returns nothing
You did not assign result, or you assigned something unserialisable. Convert bpy objects to primitives.
An operator runs but nothing happens
bpy.ops operators depend on context: mode, active object, and selection. And active and selected are different things. Many operators need both.
import bpy
obj = bpy.data.objects["head"]
bpy.ops.object.mode_set(mode='OBJECT')
bpy.ops.object.select_all(action='DESELECT')
obj.select_set(True)
bpy.context.view_layer.objects.active = obj
Why both lines: select_set(True) puts it in the selection. view_layer.objects.active = obj makes it the active object. An operator like apply modifier acts on the active one; join acts on the selection. Set both explicitly and do not assume state carries between calls; operators change selection as a side effect.
Reading a property gives a stale value
Blender evaluates lazily. After changing anything, update the dependency graph before reading computed values like world matrices or modifier results:
bpy.context.view_layer.update()Or use evaluated_depsgraph_get() as shown earlier.
Editing mesh geometry does not stick
In Edit Mode, the regular mesh API is not authoritative. Use bmesh, and flush changes back. In Object Mode, mesh.vertices works directly. Mixing the two silently loses edits.
Re-running an edited script exports the old behaviour
This one cost me a confusing cycle. export_character.py imports facial_morphs. Python caches imported modules, so editing facial_morphs.py and re-running the export re-exports the old fields.
import sys, runpy, importlib
base = "/path/to/project/blender"
if base not in sys.path:
    sys.path.insert(0, base)
for m in ("facial_morphs", "body_profile", "export_character"):
    if m in sys.modules:
        del sys.modules[m]
import facial_morphs
importlib.reload(facial_morphs)
rep = runpy.run_path(base + "/export_character.py", run_name="__mod__")["export"]()The file shows as unsaved after you inspect it
is_dirty: true can appear even from read-only-looking work, because scripts touch datablocks. Check before assuming you changed something:
result = {"filepath": bpy.data.filepath, "is_dirty": bpy.data.is_dirty}For this project the export was deliberately non-destructive: it duplicates meshes into a temp collection, applies modifiers there, exports, then purges. The source .blend is never written by the pipeline.
Debugging workflow
The loop that worked:
+----------------------------------------------+
| 1. ASK      query the scene, do not assume   |
| 2. ASSERT   check the answer is what you     |
|             think (filepath, counts, names)  |
| 3. SCRIPT   write the change to a .py file   |
| 4. RUN      execute inside the live session  |
| 5. VERIFY   re-query, or render a viewport   |
+----------------------------------------------+
Two rules that saved the most time:
A worked example
Question: is the collision profile fitted to real geometry or to the cage?
import bpy
deps = bpy.context.evaluated_depsgraph_get()
o = bpy.data.objects["head"]
ev = o.evaluated_get(deps)
m = ev.to_mesh()
result = {"cage_verts": len(o.data.vertices), "evaluated_verts": len(m.vertices)}
ev.to_mesh_clear()
Cage 1,026 vertices vs. evaluated far more after Subdivision. Fitting a body profile to 1,026 points spread over a whole head gives cross-sections that miss. That is why body_profile.py evaluates first, and why it uses percentiles (PCT = 0.94) rather than min/max, since the hoodie drawstrings are real geometry and they inflate a naive bounding fit.
Security note
Say it once more, plainly: an MCP server wired to bpy can run arbitrary Python as your user. It can read and write files anywhere you can.
Read the source before installing.
Prefer local transports over anything listening on a network interface.
Keep Online Access off unless you need it.
Do not run it against a .blend you cannot afford to lose. Keep backups. Blender's own .blend1 rotation is a decent safety net, and this project relied on it.
Key Takeaways
- 1
Ask the scene, do not assume it: One query showed DEF-f_index.01.L parented to ORG-palm.01.L, which is why a naive glTF export detaches every finger.
- 2
Rigify's DEF-, ORG-, MCH- split is a rigging feature and an export trap: 400 bones, 71 deform, and the deform bones are parented through non-deform ones.
- 3
Shape keys live on mesh data and are None when absent: This character had zero across all 147 meshes, which is why the facial rig is generated.
- 4
Object names and mesh datablock names differ: The head object's mesh is Plane.004.
- 5
Measure evaluated meshes, not cages: The eyebrow strip is 20 vertices before Subdivision.
- 6
result is how execute_blender_code returns data: And it must be JSON-serialisable.
- 7
Clear sys.modules before re-running an edited script: Otherwise you will export stale behaviour and blame your fix.
- 8
Doc search is an AND match on tokens: Empty results usually mean your token combination is too specific.
- 9
Set active and selected explicitly: Before any operator, and update the depsgraph before reading computed values.
Resources
Blender: blender.org/download (https://www.blender.org/download/). LTS releases recommended.
Official Blender MCP server: blender.org/lab/mcp-server (https://www.blender.org/lab/mcp-server/). Blender's own MCP server page with current install instructions and links to the source.
Claude Desktop: claude.ai/download (https://claude.ai/download).
Model Context Protocol: modelcontextprotocol.io (https://modelcontextprotocol.io) for the spec and how servers and clients relate.
Blender Python API reference: bpy.types.Armature, bpy.types.Mesh.shape_keys, bpy.types.Object.evaluated_get, bpy.types.Depsgraph.
Rigify documentation: The Blender manual's Rigify section covers the DEF-, ORG-, MCH- naming convention.
Blender Extensions: The manual's Add-ons and Extensions pages cover install-from-disk and the Online Access preference.
The rest of the series
This is Part 2 of a 10-part series. The other parts:
- 1
How I Built an AI-Powered ASL Sign Character with Claude Code
- 2
Building a Production Ready Sign Language Character
- 3
Designing the Goal Prompt
- 4
Loop Engineering Explained
- 5
Building Natural ASL Animation
- 6
Project Folder Architecture
- 7
Every Prompt Used During Development
- 8
Common Problems We Solved
- 9
Lessons Learned
Frequently Asked Questions
What is Blender MCP?
A Model Context Protocol server that exposes Blender's Python API as tools an AI client can call. It lets Claude inspect and script a live Blender session (reading bones, meshes, shape keys, materials and modifiers, and running bpy code) rather than working from assumptions about your scene.
Do I need Claude Desktop, or does Claude Code work?
Both speak MCP. Claude Code was necessary for this project because the work spanned Blender and the filesystem and a shell: writing Python to disk, running it in Blender, then loading the exported GLB in a Next.js app. Claude Desktop is fine for inspecting a scene and asking questions about it.
Does Blender need to be open?
For the interactive server, yes. It attaches to a running session. That is the main benefit: it sees your actual open file. Several tools have _for_cli variants for headless Blender in background mode.
Why did my glTF export break the finger hierarchy?
Because Rigify parents DEF- bones to ORG- and MCH- bones. Exporting only deform bones excludes those parents, orphaning the children. You need to rebuild a clean deform-only hierarchy before exporting: walk each deform bone's ancestors and reparent to the nearest deform ancestor, following the ORG- to DEF- twin naming.
How do I check whether a character has a facial rig?
Iterate meshes and test o.data.shape_keys. It is None when there are none. Guard before touching .key_blocks, or you will get an AttributeError on the first mesh without keys.
Why does my script export old behaviour after I edit it?
Python caches imported modules. If your export script imports a helper module, editing the helper and re-running the export uses the cached version. Delete the entries from sys.modules before re-running.
Is it safe to install a Blender MCP server?
It executes arbitrary Python with your user's permissions, that is what it is for. Read the source before installing, prefer local transports, leave Online Access off unless needed, and keep backups of any .blend you care about.
Can I use this to generate a character from scratch?
You can, but that was not this project. The character already existed and the explicit constraint was not to replace it. Inspection-first is also just better practice: a query that tells you the real bone names beats generating something whose names you already know.
If you are wiring AI agents into real tools with real user permissions, the failure modes here (arbitrary code execution, cached module state, silent hierarchy loss) matter more than the happy path. That is exactly the kind of AI product engineering we ship at ETechViral. Part 3 of this series covers the production-ready character export in full.
- Blender
- MCP
- Claude Code
- Rigify
- Python
- bpy
- glTF
- Model Context Protocol
Related articles

How I Built an AI-Powered ASL Sign Character with Claude Code
A real engineering breakdown of a 3D character that signs any English sentence in ASL, synthesised at runtime from the ASL-LEX 2.0 phonological database, driven by analytic IK in three.js, with no pre-recorded animation.
22 min read
Self-Hosting n8n in Production: A Real-World Setup Guide (nginx, PM2, Node, and the Bugs Nobody Warns You About)
A step-by-step, battle-tested guide to self-hosting n8n on your own server with nginx, PM2, and the correct Node version, plus fixes for the localhost webhook URL bug, npm install stalls, and password resets without SMTP.
15 min read
Building a Production Ready Sign Language Character
What a 3D character actually needs to sign ASL: finger topology, deform hierarchy, facial openings, shape keys, and how to export a 400-bone Rigify rig to a web-sized GLB without breaking the hands.
15 min read